However, for us humans, it is a near-impossible task to remember these IP addresses corresponding to each site. This is where the role of DNS comes into play. It holds all the website domain names and their associated IP addresses. So when you input a URL, the browser would look into this stored record to find the associated IP. However, this indexing takes time. As a result, once the browser gets hold of the IP, it stores it locally onto your PC. The next time you visit that site again, it wouldn’t have to go through the plethora of stored information in the DNS book. Rather, it would pick up the required data from the DNS cache stored on your PC. However, with time, the website might undergo a few changes which might not get reflected in the stored cache. Along the same lines, if a lot of DNS cache gets accumulated, or any of its stored data gets corrupted, then it could slow down the loading of web pages. In this regard, you should consider deleting these data so that Windows is able to re-populate the fresh one from scratch. And in this guide, we will show you how to do just that. Given hereby are three different methods to flush the DNS Cache in Windows 11. Follow along for the instructions.
Ways to Flush DNS Cache in Windows 11
There exist three different methods to carry out the aforementioned task- via Command Prompt, using PowerShell Window, or through the Run dialog box. We have listed the steps for all these three methods, you may try out the one that you find the easiest to deal with.
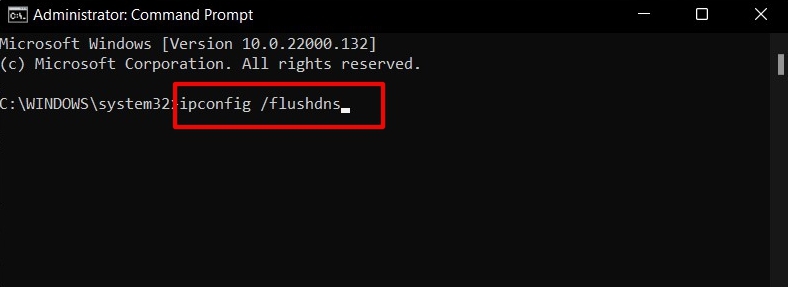
Flush DNS Cache via Command Prompt
Once done, you shall be notified of the same via the “Successfully flushed DNS Resolver Cache” message.
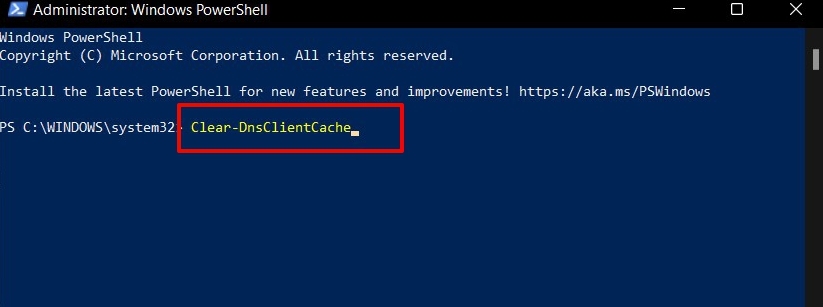
Flush DNS Cache via Powershell
So, this was the second method to flush DNS Cache in Windows 11. Let’s now make you aware of the third and final one.
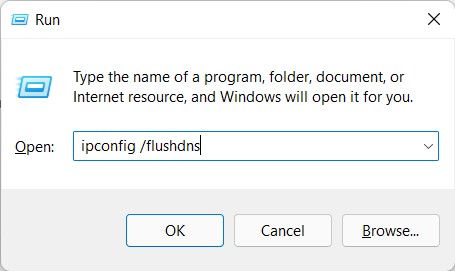
Flush DNS Cache via Run
Conclusion
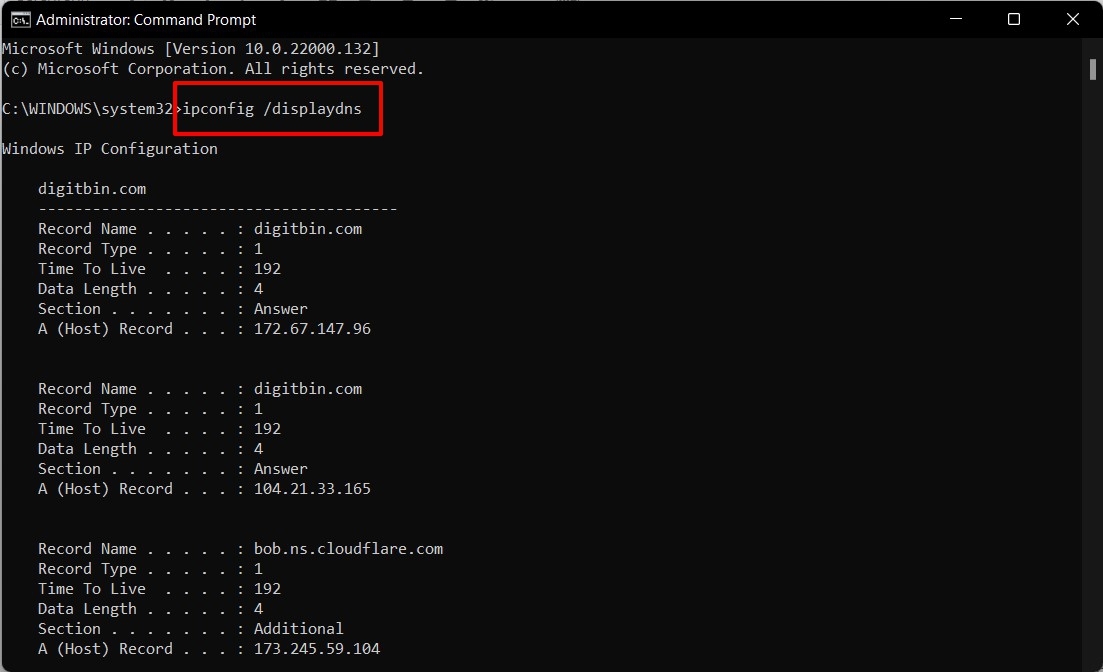
With this, we round off the guide on how you could flush DNS Cache in Windows 11. If at any point in time, you wish to get a hold of the currently stored DNS cache, then you could easily do so by just executing the ipconfig /displaydns command in the CMD window, as shown below:
Moreover, once you delete the DNS cache, the websites might take a few seconds extra to load. This is because the browser will now index its search inside the DNS book, rather than the cached data that was stored on your PC, which has now been deleted. However, this would only be a one-time delay as the browser will automatically repopulate the DNS cache once it visits that site. On that note, we round off this guide to flush DNS Cache in Windows 11. We have shared three different methods for the same. Do let us know in the comments which approach you ultimately decided to settle for. If you’ve any thoughts on [3 Methods] How to Flush DNS Cache in Windows 11?, then feel free to drop in below comment box. Also, please subscribe to our DigitBin YouTube channel for videos tutorials. Cheers!